

Overview
Good documentation is the backbone of any robust API. It ensures that developers can effectively use and maintain APIs, reducing onboarding time and minimizing support requests.
For .NET REST APIs, well-crafted documentation plays a crucial role in enabling seamless integration and enhancing the overall developer experience. In this article, we'll explore the importance of API documentation, delve into using tools like Swagger/OpenAPI for .NET APIs, and share best practices for writing and automating documentation with code examples. For better automation and visualization, check out our article on top API documentation tools in 2024.
Importance of API Documentation
API documentation serves as a comprehensive guide for developers on how to interact with your API. It provides essential information such as endpoints, request and response formats, authentication methods, error codes, and examples of API calls.
Here’s why good API documentation is indispensable:
Enhanced Developer Experience: Clear documentation helps developers understand how to use the API effectively, reducing the learning curve and accelerating development. How to build a perfect API description is key to creating clear documentation that developers can easily understand and apply.
Example: Imagine a developer integrating a payment gateway API. If the documentation clearly explains the required headers, request bodies, and response structures, the developer can quickly set up transactions, handle errors, and ensure the integration works smoothly.
// An example of a .NET 8 API controller method for processing payments
[HttpPost("process-payment")]
public async Task<IActionResult> ProcessPayment([FromBody] PaymentRequest request)
{
    if (!ModelState.IsValid)
    {
        return BadRequest("Invalid payment details.");
    }

    var result = await _paymentService.ProcessPaymentAsync(request);

    if (result.IsSuccess)
    {
        return Ok(new { message = "Payment processed successfully." });
    }
    else
    {
        return StatusCode(StatusCodes.Status500InternalServerError, new { error = result.ErrorMessage });
    }
}

// Example documentation:
// POST /api/process-payment
// Request Body:
// {
//    "cardNumber": "1234567812345678",
//    "expiryDate": "12/25",
//    "amount": 100.00
// }
// Response:
// 200 OK: { "message": "Payment processed successfully." }
// 400 Bad Request: { "error": "Invalid payment details." }
// 500 Internal Server Error: { "error": "Payment gateway unavailable." }
Explanation: This code snippet provides a sample API endpoint to process a payment. The accompanying documentation shows the request body format and possible responses, making it clear to developers how to use this endpoint.
Reduced Support Costs: When documentation is thorough and accurate, it reduces the number of support tickets and inquiries, saving time and resources.
Example: For a shipping API, if common error codes (like "INVALID_ADDRESS" or "SERVICE_UNAVAILABLE") are well-documented with suggested solutions, support teams spend less time assisting developers, who can resolve issues independently.
// An example of a .NET 8 API controller method for validating addresses
[HttpPost("validate-address")]
public IActionResult ValidateAddress([FromBody] AddressRequest address)
{
    if (string.IsNullOrWhiteSpace(address.Street) || string.IsNullOrWhiteSpace(address.ZipCode))
    {
        return BadRequest(new { error = "INVALID_ADDRESS", message = "Street and ZipCode are required." });
    }

    var isValid = _addressService.Validate(address);
    if (!isValid)
    {
        return BadRequest(new { error = "INVALID_ADDRESS", message = "The address could not be validated." });
    }

    return Ok(new { message = "Address is valid." });
}

// Example documentation:
// POST /api/validate-address
// Request Body:
// {
//    "street": "123 Main St",
//    "zipCode": "12345"
// }
// Response:
// 200 OK: { "message": "Address is valid." }
// 400 Bad Request: { "error": "INVALID_ADDRESS", "message": "The address could not be validated." }Explanation: The endpoint here is for address validation, and the example documentation includes possible error responses. This helps developers understand what might go wrong and how to handle those errors.
Improved Maintenance and Updates: Well-maintained documentation simplifies the process of updating and maintaining APIs, especially when changes are made to the endpoints or functionalities.
Example: If a new version of an API endpoint is released, clear versioning in the documentation allows developers to know what changes were made, what endpoints are deprecated, and how to update their code accordingly.
// An updated version of the API endpoint for fetching user details
[HttpGet("v2/user-details/{id}")]
public async Task<IActionResult> GetUserDetailsV2(Guid id)
{
    var user = await _userService.GetUserByIdAsync(id);

    if (user == null)
    {
        return NotFound(new { error = "USER_NOT_FOUND", message = "The user was not found." });
    }

    return Ok(new
    {
        id = user.Id,
        name = user.Name,
        email = user.Email,
        registrationDate = user.RegistrationDate
    });
}

// Example documentation for versioning:
// GET /api/v2/user-details/{id}
// Response:
// 200 OK: { "id": "123", "name": "John Doe", "email": "[email protected]", "registrationDate": "2023-01-01" }
// 404 Not Found: { "error": "USER_NOT_FOUND", "message": "The user was not found." }
Explanation: This code snippet shows an updated API endpoint version (v2) for fetching user details, with corresponding documentation to highlight the new structure and response format.
Better Adoption and Integration: Comprehensive documentation makes your API more attractive to developers, leading to higher adoption rates and better integration with other services.
Example: A social media API that includes detailed guides and code snippets for various programming languages will likely see higher usage and better developer satisfaction compared to one with sparse documentation.
// An example of a .NET 8 API endpoint for posting a status update on a social media platform
[HttpPost("post-status")]
public async Task<IActionResult> PostStatus([FromBody] StatusUpdateRequest request)
{
    if (string.IsNullOrWhiteSpace(request.Content))
    {
        return BadRequest(new { error = "EMPTY_STATUS", message = "Status content cannot be empty." });
    }

    var result = await _socialMediaService.PostStatusAsync(request);

    if (result.IsSuccess)
    {
        return Ok(new { message = "Status posted successfully." });
    }
    else
    {
        return StatusCode(StatusCodes.Status500InternalServerError, new { error = result.ErrorMessage });
    }
}

// Example documentation:
// POST /api/post-status
// Request Body:
// {
//    "content": "Hello, world!",
//    "tags": ["greetings", "world"]
// }
// Response:
// 200 OK: { "message": "Status posted successfully." }
// 400 Bad Request: { "error": "EMPTY_STATUS", "message": "Status content cannot be empty." }
// 500 Internal Server Error: { "error": "Failed to post status due to server error." }
Explanation: This example demonstrates a simple API endpoint for posting a status update, with detailed documentation to help developers integrate the endpoint into their applications easily.
Using Swagger/OpenAPI for .NET APIs
Swagger, now part of the OpenAPI Specification, is a powerful tool for designing, building, documenting, and consuming REST APIs. It allows developers to visualize and interact with API resources without having any of the implementation logic in place.
Why Use Swagger/OpenAPI?
Interactive Documentation: Swagger generates interactive documentation, enabling developers to test API endpoints directly from the documentation page.
Example: A developer working with a .NET API for an e-commerce platform can use the Swagger UI to test the "Create Order" endpoint directly, entering sample data and seeing the real-time response, which speeds up testing and debugging.
// Example of a .NET 8 API controller method for creating an order
[HttpPost("create-order")]
public async Task<IActionResult> CreateOrder([FromBody] OrderRequest orderRequest)
{
    if (!ModelState.IsValid)
    {
        return BadRequest(ModelState);
    }

    var order = await _orderService.CreateOrderAsync(orderRequest);

    return CreatedAtAction(nameof(GetOrderById), new { id = order.Id }, order);
}

// Example Swagger/OpenAPI documentation:
// POST /api/create-order
// Request Body:
// {
//    "productId": "98765",
//    "quantity": 2,
//    "shippingAddress": "123 Main St, Anytown, USA"
// }
// Response:
// 201 Created: { "id": "12345", "productId": "98765", "quantity": 2, "status": "Pending" }
Explanation: This code snippet shows an example endpoint for creating an order. Using Swagger UI, developers can interact with this endpoint by providing the necessary request body and testing different scenarios.
Standardization: Adhering to the OpenAPI Specification ensures consistency and compatibility across different platforms and services.
Example: By following OpenAPI standards, a weather data API ensures its documentation is compatible with tools like Postman and Insomnia, making it easier for developers to test and integrate.
// Example of a standardized API endpoint for retrieving weather data
[HttpGet("weather")]
public IActionResult GetWeather([FromQuery] string city)
{
    if (string.IsNullOrEmpty(city))
    {
        return BadRequest(new { error = "MISSING_CITY", message = "City parameter is required." });
    }

    var weather = _weatherService.GetWeather(city);

    if (weather == null)
    {
        return NotFound(new { error = "CITY_NOT_FOUND", message = "Weather data for the specified city could not be found." });
    }

    return Ok(weather);
}

// Example Swagger/OpenAPI documentation:
// GET /api/weather?city=Seattle
// Response:
// 200 OK: { "city": "Seattle", "temperature": "15°C", "condition": "Cloudy" }
// 400 Bad Request: { "error": "MISSING_CITY", "message": "City parameter is required." }
// 404 Not Found: { "error": "CITY_NOT_FOUND", "message": "Weather data for the specified city could not be found." }
Explanation: This standardized endpoint for retrieving weather data adheres to OpenAPI specifications, ensuring compatibility with various tools and platforms.
Automation: Swagger can automatically generate documentation based on the codebase, minimizing manual effort and reducing errors. Treblle offers a similar solution, and you can explore Treblle API documentation Phil's standards review to learn more about Treblle’s capabilities.
Example: For a large API with hundreds of endpoints, manually writing documentation would be error-prone and time-consuming. Swagger automates this process, ensuring accuracy and consistency.
// Example of automated documentation generation with Swagger in .NET 8
public void ConfigureServices(IServiceCollection services)
{
    services.AddControllers();
    services.AddSwaggerGen(c =>
    {
        c.SwaggerDoc("v1", new OpenApiInfo { Title = "My API", Version = "v1" });
        // Automatically include XML comments in Swagger documentation
        var xmlFile = $"{Assembly.GetExecutingAssembly().GetName().Name}.xml";
        var xmlPath = Path.Combine(AppContext.BaseDirectory, xmlFile);
        c.IncludeXmlComments(xmlPath);
    });
}

public void Configure(IApplicationBuilder app, IWebHostEnvironment env)
{
    if (env.IsDevelopment())
    {
        app.UseDeveloperExceptionPage();
    }

    app.UseSwagger();
    app.UseSwaggerUI(c =>
    {
        c.SwaggerEndpoint("/swagger/v1/swagger.json", "My API V1");
        c.RoutePrefix = string.Empty; // To serve the Swagger UI at the app's root
    });

    app.UseRouting();
    app.UseAuthorization();
    app.UseEndpoints(endpoints =>
    {
        endpoints.MapControllers();
    });
}
Explanation: This configuration automatically generates Swagger documentation by including XML comments from the codebase, making it easier to keep documentation up-to-date with code changes.
Best Practices for Writing Documentation
From my experience, the key to effective API documentation lies in its clarity, accuracy, and accessibility. Here are some best practices to consider:
Be Concise and Clear: Avoid jargon and write in simple language. Developers should be able to understand the API's functionality without extensive explanations. Learn more about writing clear and concise documentation by following these 11 Best practices for writing API documentation.
Example: Instead of writing, "This endpoint facilitates the acquisition of itemized data," use "This endpoint retrieves a list of items."
/// <summary>
/// Retrieves all items.
/// </summary>
/// <returns>A list of items.</returns>
[HttpGet("items")]
public IActionResult GetAllItems()
{
    var items = _itemService.GetAllItems();
    return Ok(items);
}

// Example Swagger/OpenAPI documentation:
// GET /api/items
// Response:
// 200 OK: [{ "id": "1", "name": "Item 1" }, { "id": "2", "name": "Item 2" }]
Explanation: The example shows a simple endpoint with a concise summary, making it clear what the endpoint does without unnecessary jargon.
Use Real-World Examples: Provide examples that mirror real-world scenarios. This helps developers understand how to use the API in practical applications.
Example: If your API supports multiple content types, provide examples for each type. For instance, show how to request a JSON response and an XML response using the same endpoint.
/// <summary>
/// Retrieves user details in JSON or XML format.
/// </summary>
/// <param name="id">The ID of the user.</param>
/// <returns>User details in the requested format.</returns>
[HttpGet("user-details/{id}")]
[Produces("application/json", "application/xml")]
public IActionResult GetUserDetails(Guid id)
{
    var user = _userService.GetUserById(id);
    if (user == null)
    {
        return NotFound(new { error = "USER_NOT_FOUND", message = "The user was not found." });
    }
    return Ok(user);
}

// Example Swagger/OpenAPI documentation:
// GET /api/user-details/{id}
// Accept: application/json
// Response:
// 200 OK: { "id": "1", "name": "Jane Doe", "email": "[email protected]" }
// Accept: application/xml
// Response:
// 200 OK: <User><Id>1</Id><Name>Jane Doe</Name><Email>[email protected]</Email></User>
Explanation: This example demonstrates how to document an endpoint that supports multiple response formats, helping developers understand how to request and handle different content types.
Keep Documentation Up-to-Date: Regularly review and update the documentation to reflect any changes in the API. Outdated documentation can lead to confusion and integration failures.
Example: If you add a new optional parameter to an endpoint, immediately update the documentation to include this parameter, its purpose, and its effect on the response.
/// <summary>
/// Retrieves a paginated list of items.
/// </summary>
/// <param name="pageNumber">The page number (optional).</param>
/// <param name="pageSize">The size of the page (optional).</param>
/// <returns>A paginated list of items.</returns>
[HttpGet("items")]
public IActionResult GetItems(int pageNumber = 1, int pageSize = 10)
{
    var items = _itemService.GetItems(pageNumber, pageSize);
    return Ok(items);
}

// Example Swagger/OpenAPI documentation:
// GET /api/items?pageNumber=1&pageSize=10
// Response:
// 200 OK: [{ "id": "1", "name": "Item 1" }, { "id": "2", "name": "Item 2" }]
Explanation: This example shows how to document a paginated endpoint with optional parameters, ensuring developers understand how to use pagination effectively.
Organize Documentation Logically: Structure your documentation in a logical order. Start with an overview, then move to authentication, endpoints, request and response formats, error handling, and finally, examples.
Example: For an authentication section, include sample requests and responses for login, token refresh, and logout, and explain each step clearly.
/// <summary>
/// Authenticates a user and returns a token.
/// </summary>
/// <param name="loginRequest">The login request details.</param>
/// <returns>A JWT token if authentication is successful.</returns>
[HttpPost("login")]
public IActionResult Login([FromBody] LoginRequest loginRequest)
{
    var token = _authService.Authenticate(loginRequest);
    if (token == null)
    {
        return Unauthorized(new { error = "INVALID_CREDENTIALS", message = "Username or password is incorrect." });
    }
    return Ok(new { token });
}

// Example Swagger/OpenAPI documentation:
// POST /api/login
// Request Body:
// {
//    "username": "user123",
//    "password": "password123"
// }
// Response:
// 200 OK: { "token": "eyJhbGciOiJIUzI1NiIsInR5cCI6IkpXVCJ9..." }
// 401 Unauthorized: { "error": "INVALID_CREDENTIALS", "message": "Username or password is incorrect." }
Explanation: This example shows how to document an authentication endpoint, providing clear information on request and response formats and potential error messages.
Include Error Codes and Responses: Document potential error codes and their meanings. This will help developers troubleshoot issues more effectively.
Example: List common errors like "404 Not Found" and "500 Internal Server Error" with explanations on why they might occur and how to handle them.
/// <summary>
/// Retrieves an item by ID.
/// </summary>
/// <param name="id">The ID of the item.</param>
/// <returns>The item details if found; otherwise, an error message.</returns>
[HttpGet("items/{id}")]
public IActionResult GetItemById(Guid id)
{
    var item = _itemService.GetItemById(id);
    if (item == null)
    {
        return NotFound(new { error = "ITEM_NOT_FOUND", message = "The item was not found." });
    }
    return Ok(item);
}

// Example Swagger/OpenAPI documentation:
// GET /api/items/{id}
// Response:
// 200 OK: { "id": "1", "name": "Item 1" }
// 404 Not Found: { "error": "ITEM_NOT_FOUND", "message": "The item was not found." }
Explanation: This example shows how to document an endpoint with specific error codes and messages, helping developers understand what to expect when something goes wrong.
Automating Documentation Generation and Updates
Automating the generation and updating of documentation can save considerable time and effort. With tools like Swagger, this process can be streamlined:
Use Code Comments for Documentation: Leverage XML comments and annotations in your code to automatically generate API documentation. This ensures that your documentation is always aligned with the latest code changes.
Example: For a UserController, use XML comments to describe each action method. When Swagger generates the documentation, it will include these comments, providing a clear and concise description of each endpoint's purpose and usage.
/// <summary>
/// Creates a new user.
/// </summary>
/// <param name="userRequest">The user details.</param>
/// <returns>The created user.</returns>
[HttpPost("users")]
public async Task<IActionResult> CreateUser([FromBody] UserRequest userRequest)
{
    if (!ModelState.IsValid)
    {
        return BadRequest(ModelState);
    }

    var user = await _userService.CreateUserAsync(userRequest);

    return CreatedAtAction(nameof(GetUserById), new { id = user.Id }, user);
}

// Example Swagger/OpenAPI documentation:
// POST /api/users
// Request Body:
// {
//    "username": "newuser",
//    "email": "[email protected]",
//    "password": "password123"
// }
// Response:
// 201 Created: { "id": "123", "username": "newuser", "email": "[email protected]" }
Explanation: The example shows how to use XML comments to document an endpoint, providing details on request and response formats, which Swagger will automatically include in the generated documentation.
Continuous Integration and Deployment (CI/CD) Pipelines: Integrate Swagger into your CI/CD pipelines to automatically regenerate and deploy documentation whenever the API is updated. This ensures that developers always have access to the most current documentation.
Example: Set up a CI/CD pipeline in Azure DevOps that triggers a documentation rebuild and deployment whenever code changes are pushed to the main branch.
# Example Azure DevOps pipeline configuration for automating Swagger documentation generation
trigger:
  branches:
    include:
      - main

pool:
  vmImage: 'windows-latest'

steps:
  - task: UseDotNet@2
    inputs:
      packageType: 'sdk'
      version: '8.x.x' # .NET 8 SDK version

  - script: dotnet build
    displayName: 'Build project'

  - script: dotnet swagger tofile --output ./swagger/v1/swagger.json bin/Debug/net8.0/MyApi.dll v1
    displayName: 'Generate Swagger documentation'

  - task: PublishBuildArtifacts@1
    inputs:
      PathtoPublish: '$(Build.ArtifactStagingDirectory)/swagger'
      ArtifactName: 'swagger'
Explanation: This YAML configuration sets up a CI/CD pipeline in Azure DevOps to automatically generate and publish Swagger documentation every time a change is pushed to the main branch.
Monitor and Analyze Documentation Usage: Use analytics tools to monitor how developers are using your API documentation. This can provide insights into which parts of the documentation are most frequently accessed and which may need improvement.
Example: Implement Google Analytics on your documentation site to track which endpoints and sections are viewed the most. If an error handling section is heavily accessed, consider expanding it with more detailed explanations and examples.
<!-- Example of adding Google Analytics tracking code to a documentation site -->
<script async src="https://www.googletagmanager.com/gtag/js?id=GA_TRACKING_ID"></script>
<script>
  window.dataLayer = window.dataLayer || [];
  function gtag(){dataLayer.push(arguments);}
  gtag('js', new Date());
  gtag('config', 'GA_TRACKING_ID');
</script>
Explanation: This HTML snippet adds Google Analytics tracking to your documentation site, allowing you to monitor usage and identify areas for improvement based on developer interaction.
From My Experience
From my experience as a .NET developer, investing time in creating and maintaining good API documentation pays off immensely in the long run. It not only enhances the developer experience but also fosters better collaboration within teams. In one of my projects, implementing Swagger significantly reduced the time spent on support and improved the onboarding process for new developers. Automating documentation updates with CI/CD also ensured that our documentation was always current, reducing the risk of errors and improving overall project efficiency.
Example: In a past project, our team struggled with manual updates to API documentation, leading to frequent mismatches between the codebase and the documentation. By integrating Swagger and setting up CI/CD automation, we eliminated these mismatches and significantly reduced developer frustration and support queries.
API Documentation with Treblle
API documentation is one of the most important parts of creating APIs today. But we have to admit that it is also the most boring, especially when it is done manually.
With the Treblle tool, this is greatly facilitated, because Treblle creates API documentation automatically for all your endpoints. This is possible because there is Open API Specification support.
Let me show you an example.
For the demo, we will use the already-added project on the Dashboard of the Treblle application. To see it, you need to log in (easiest with a Google account) here. On the home page you will see the Demo API project created by Treblle.
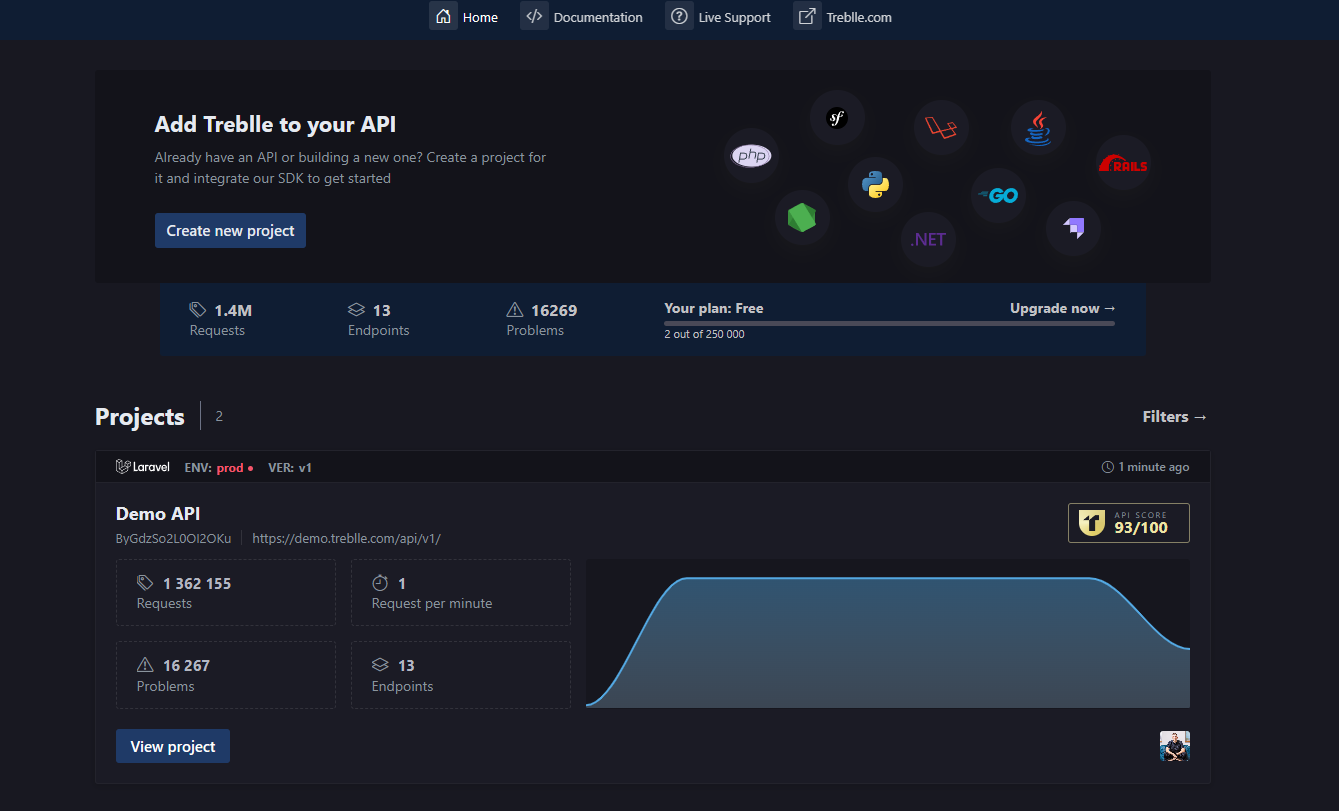
For this project, as soon as it was added, documentation was automatically generated, which you can see when you go to the details of the project ("View project" button).
On the new page, on the top right, you will see the "API Docs <>" button.
By clicking this button you will see the entire documentation with all possible details, better than the one with Swagger.

Play and have fun with this. Also, for developers using VS Code, these 4 useful VS Code Extensions for API development can further streamline your workflow.
Conclusion
Creating and managing documentation for .NET REST APIs is an essential practice that should not be overlooked. By using tools like Swagger/OpenAPI and following best practices, you can ensure that your API is well-documented, easy to use, and maintainable. Additionally, documenting API versioning properly is crucial for seamless updates, as discussed in documentation in API Versioning.
Remember, good documentation is an investment in your API's success, enhancing usability, reducing support costs, and fostering better adoption and integration.


