
If you’re looking to create a single interface between your data and your client, using a RESTful API is perhaps the best option. Today, many websites use front-end JavaScript frameworks such as React.js or Vue.js that necessitate the backend to have some RESTful API.
RESTful APIs are also required for mobile apps that use a backend application programming interface (API) to perform actions on behalf of a user. You also need RESTful APIs to provide integration techniques for third-party systems.
How do you create RESTful APIs? One convenient way is to use Laravel, which is a PHP framework that strives to save developer time. Laravel is mostly used for developing custom web applications using PHP. It also targets to advance with the web and has already assimilated numerous new features and concepts in the world of web development, including job queues, real-time communication, out-of-the-box API authentication, and more.
In this article, you’ll learn how to create a simple RESTful API in Laravel. But first, let’s take a look at what a RESTful API is.
What is RESTful API?
RESTful (also called REST) is the acronym for Representational State Transfer. It is a type of API that helps web service applications communicate with one another.
Just like all other APIs, RESTful APIs also help transfer data between users and applications. For example, when you log into a website or access an app on your phone, an API helps your client server to communicate with the host server.
Applications integrated with REST APIs aren’t tightly coupled. Each application is not familiar with the definitions and data formats being used by the other application.
The four commonly used HTTP methods supported by RESTful APIs are:
- GET – To retrieve resources
- POST- To create resources
- PUT – To update resources on the server
- DELETE – To delete resources
How to Create RESTful APIs in Laravel
Let’s take a look at the step-by-step process of creating a REST API in Laravel.
1. Create a new Laravel project
You can create a new project by using the command below. You can replace ‘SimpleApi’ with any other name for your project.

2. Configure the database
The next step is to configure the database for your application. You will have to create a new database if you do not have any.
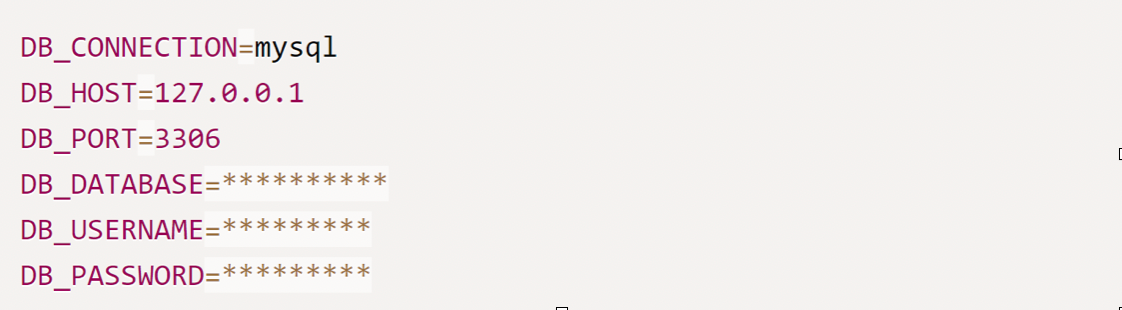
After creating the database, open .env file from your project’s root directory. If the project doesn’t have the .env file, you will have to copy content from .env.example and create a file. Several common environment variables are defined in the .env file.
In the code below, substitute * with your actual configuration.
3. Make a model and migration
Next, we create a model and migration – the Books.
The book should have a title, an author field, and a publication date. Laravel provides numerous commands through its command-line tool called Artisan. This tool helps you by creating files and organizing them in the right folders.
To create the Books model, follow this code:

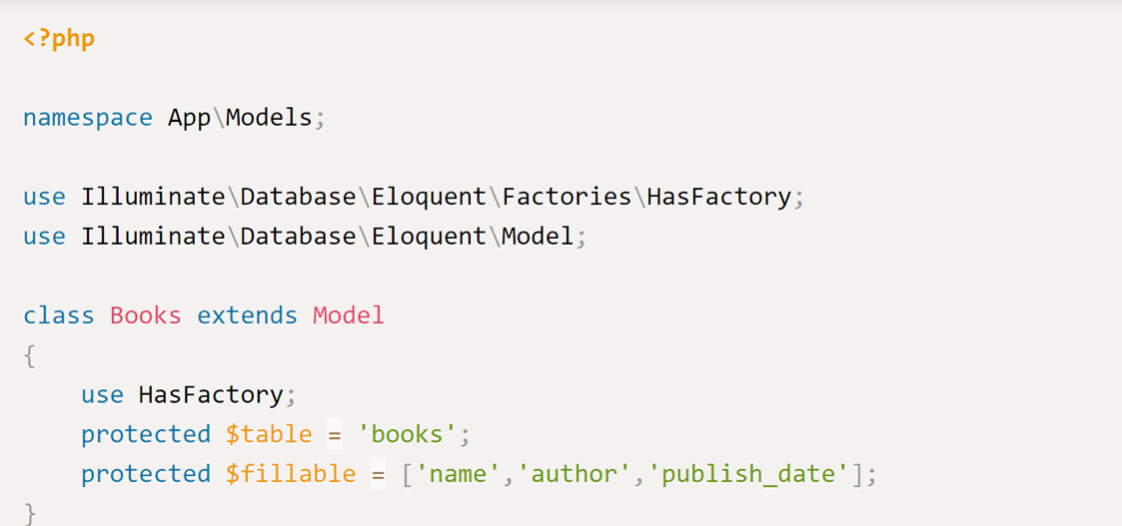
You will generate a Contact model and a migration file. Next, open the app/models/Books.php file and run this code:
Now, open the migration file (database/migrations/xxxxxx_create_books_table) and run the following commands:
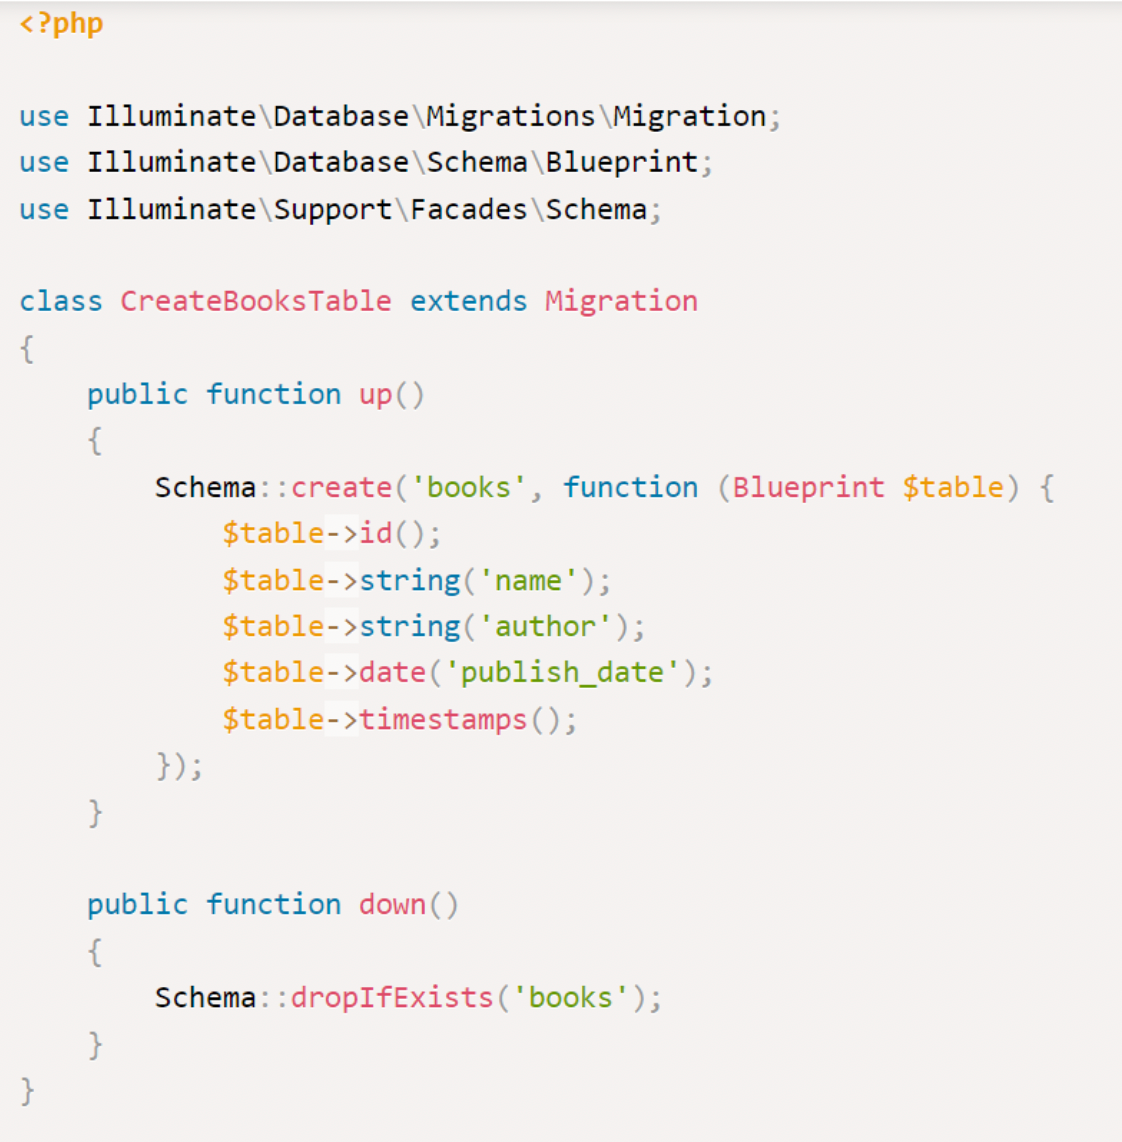
In the books table structure, add the book name, author, and publish date fields.
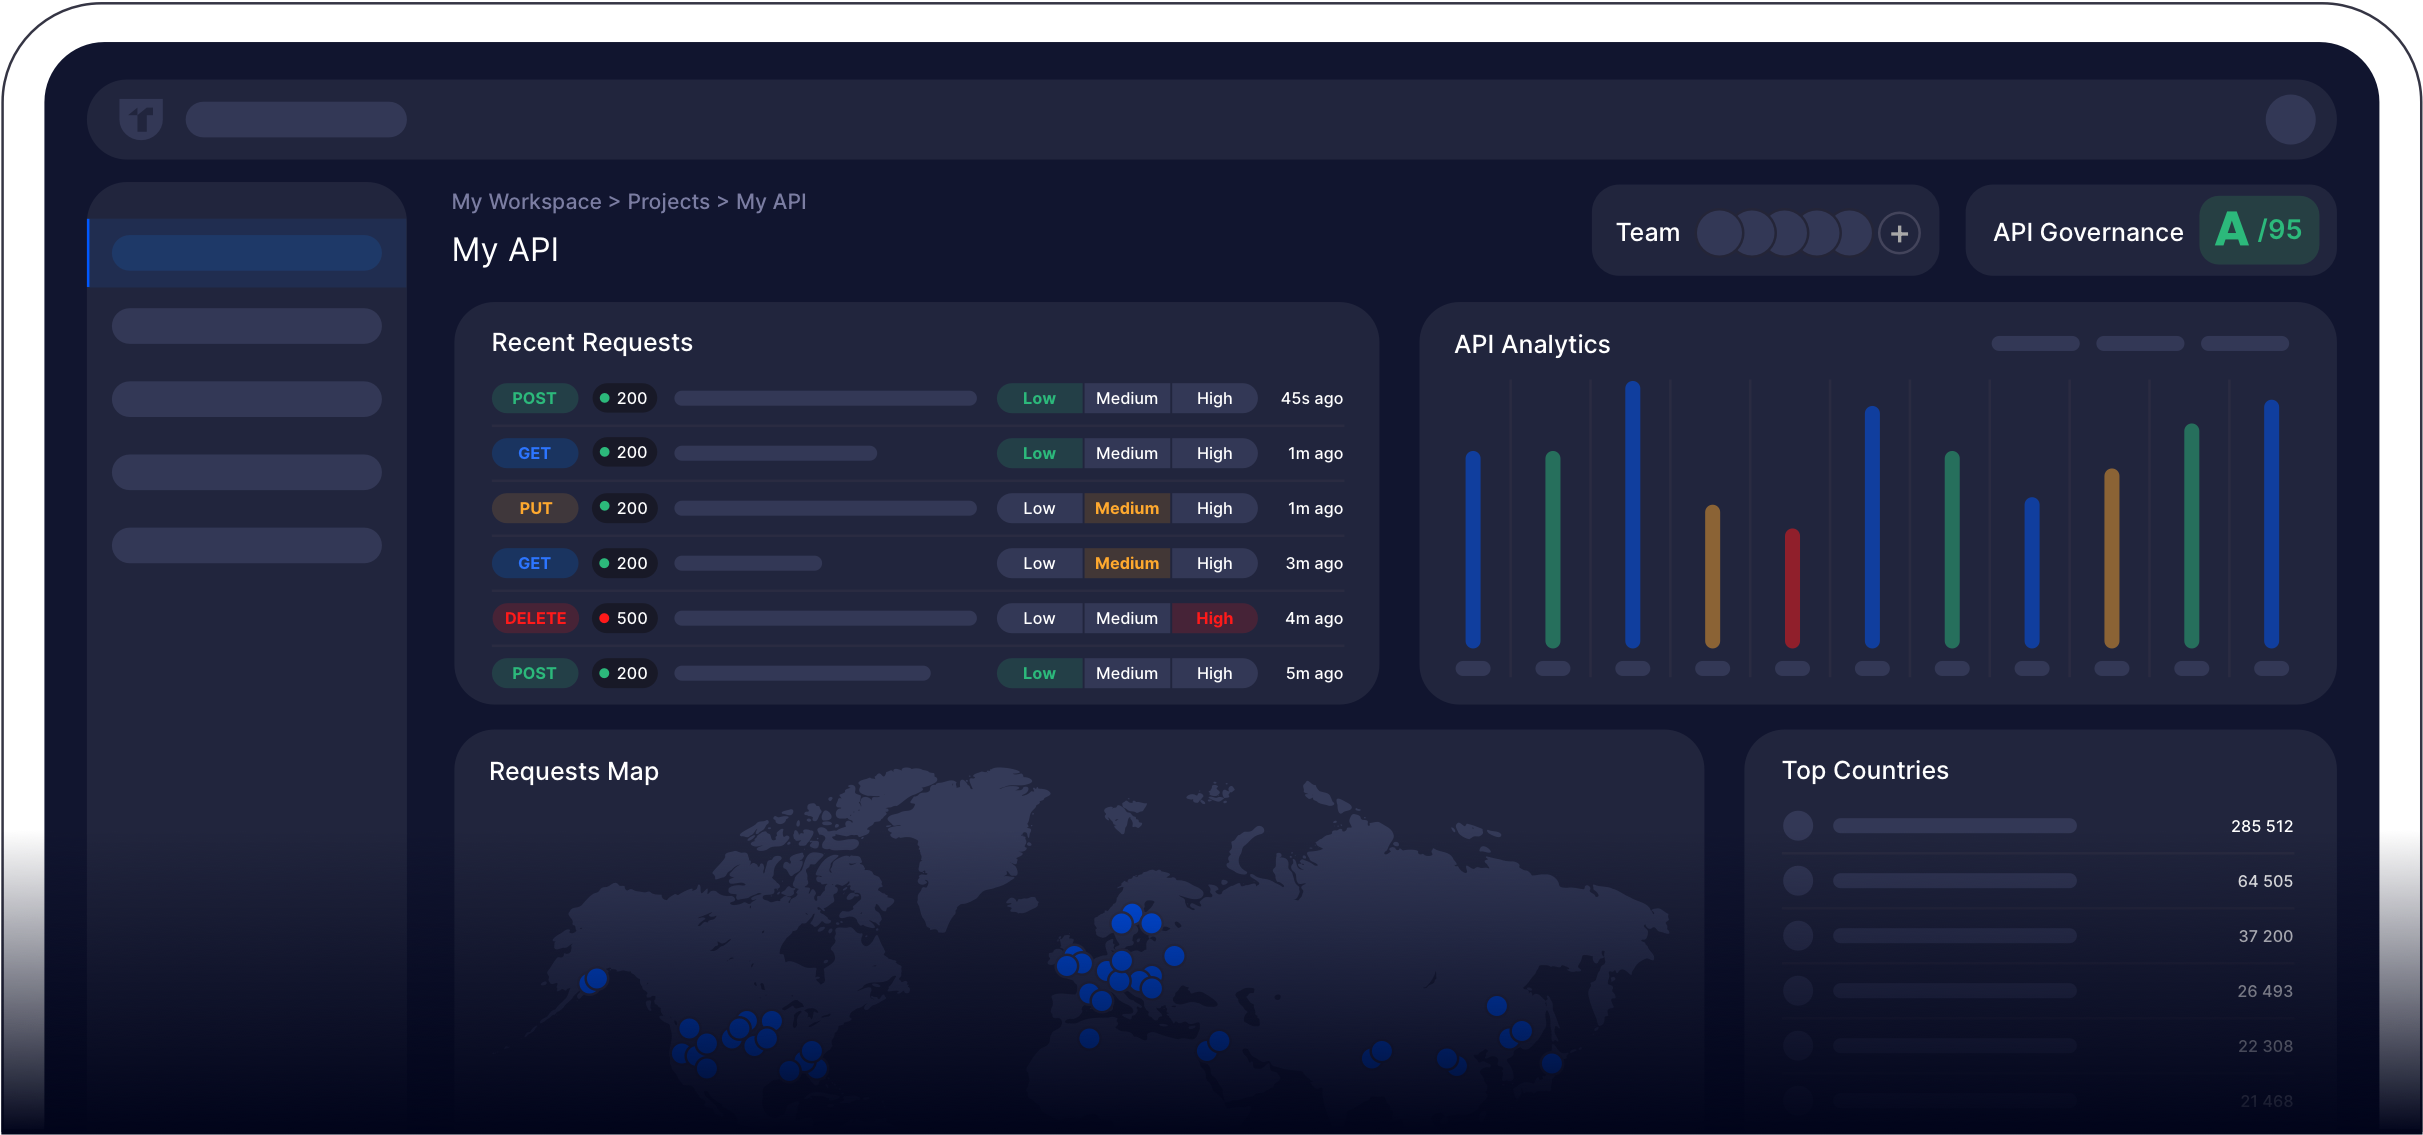
Ready to Transform Your API Development?
Step into the future with Treblle, where managing and monitoring APIs becomes a breeze. Simplify your workflow, enhance security, and gain insightful analytics with just a few clicks. Elevate your Laravel projects and see the difference today. Why wait when efficiency is at your fingertips?
4. Migrate to database
After you define the table structure, create a table into the database using the command below.

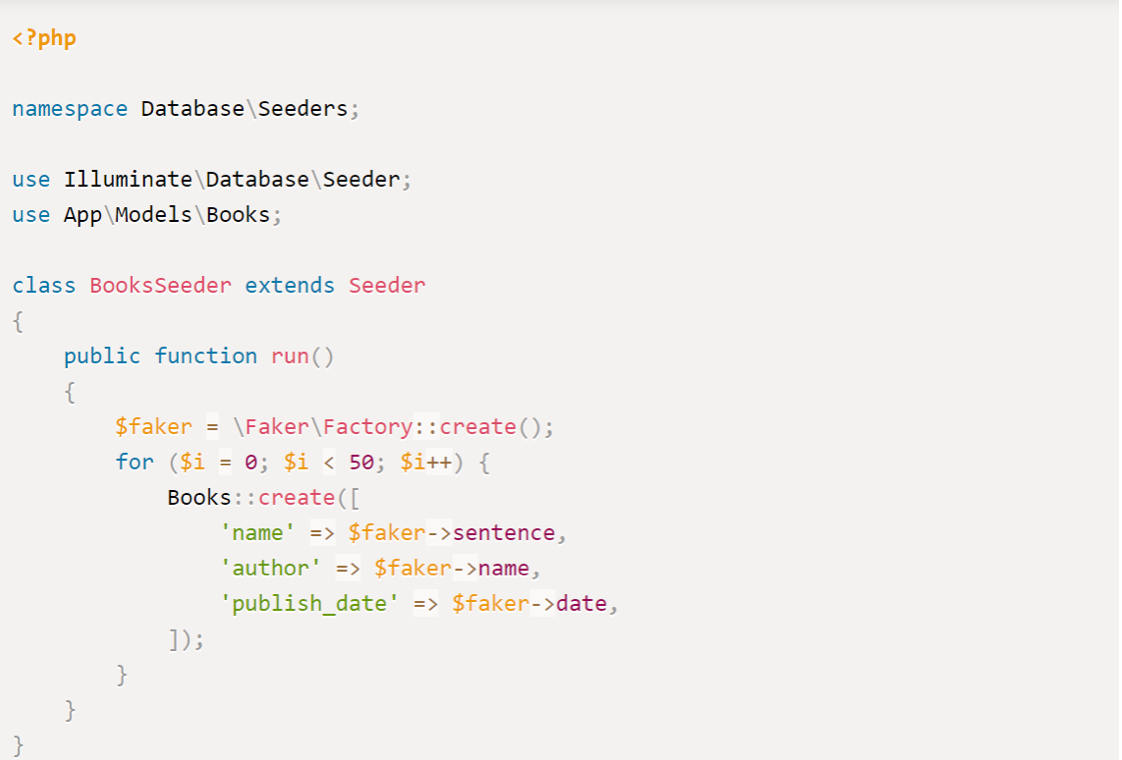
5. Perform database seeding
The next step is database seeding, which is the process of populating your database with fake data that you can use to test it. Laravel’s Faker is a useful library for producing the right format of fake data. Here’s how you can create a database seeder:

You can find the seeder in the /database/seeds directory. Once you set it up to create data of some books, you’ll see something like this:
You can use this command to run the database seeder.

6. Create the controller
With controllers, you can group related request handling logic within a single class. In a Laravel project, controllers are located in the app/Http/Controllers directory.
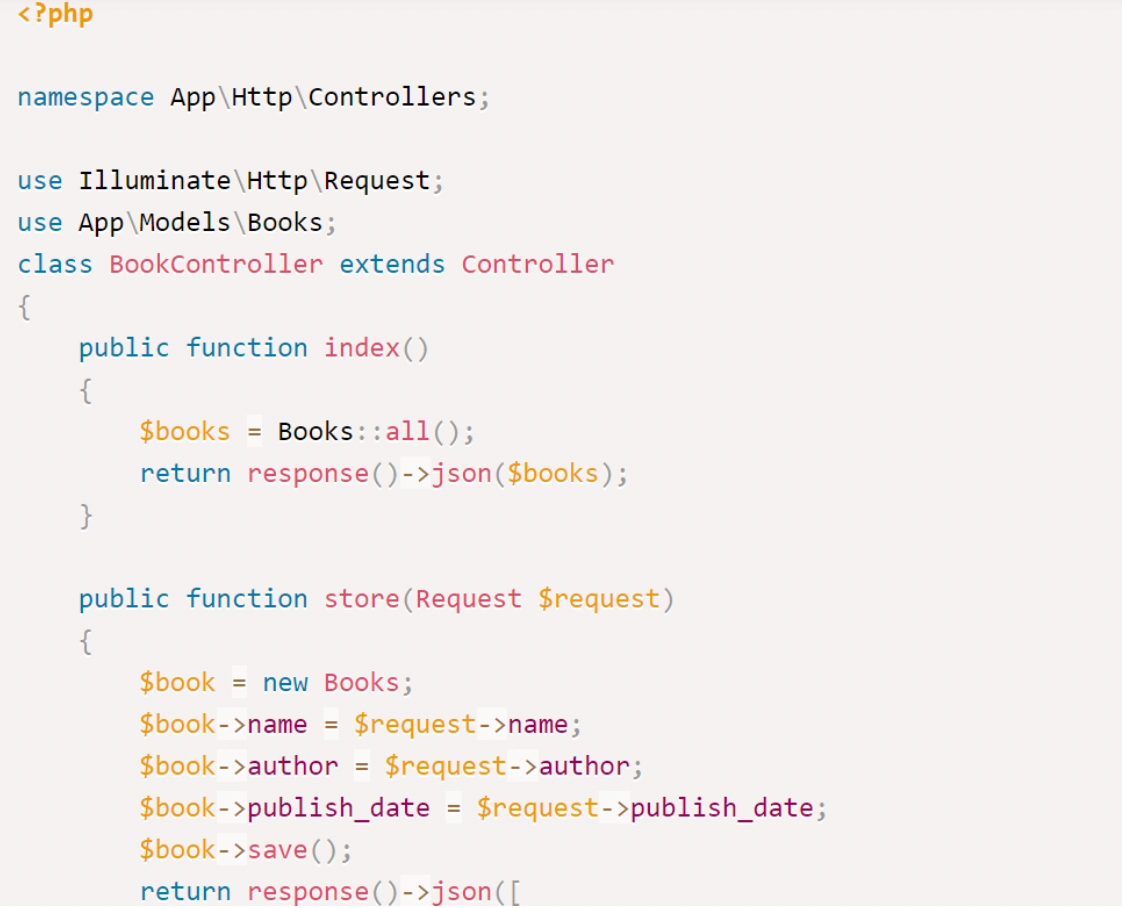
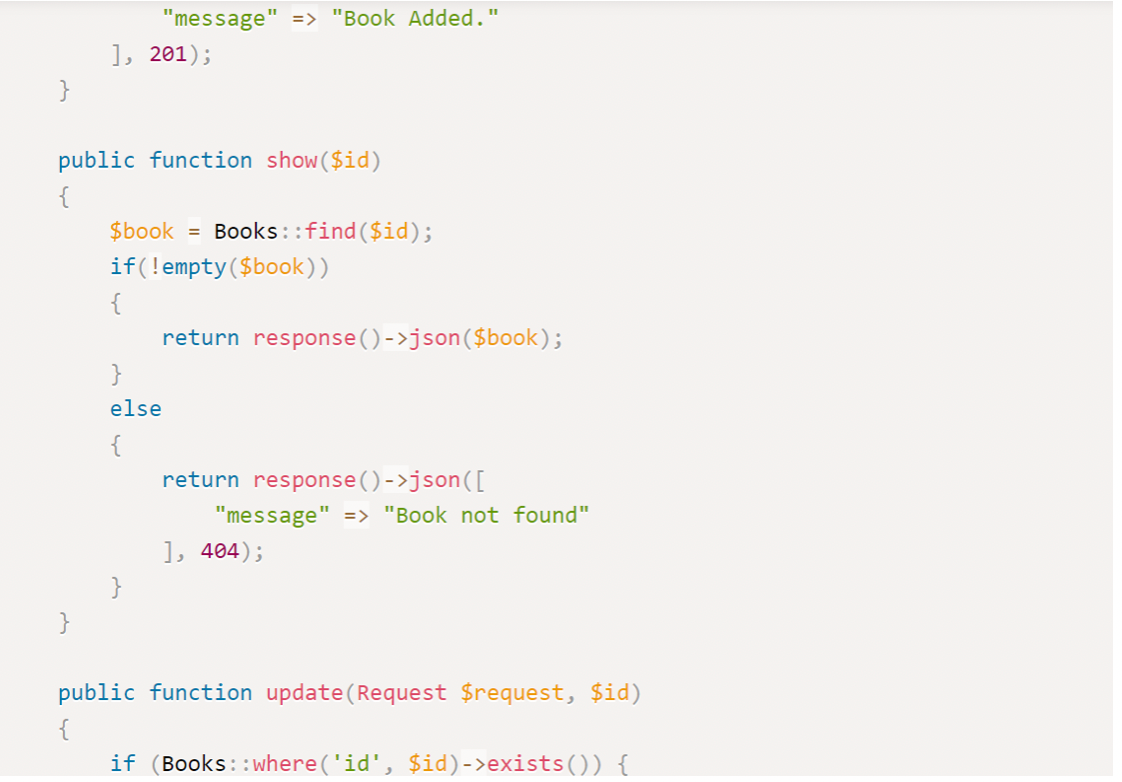
Once you create the model and migrate your database, the next step is to generate the controller to work with the Books model.
To do so, execute this command:

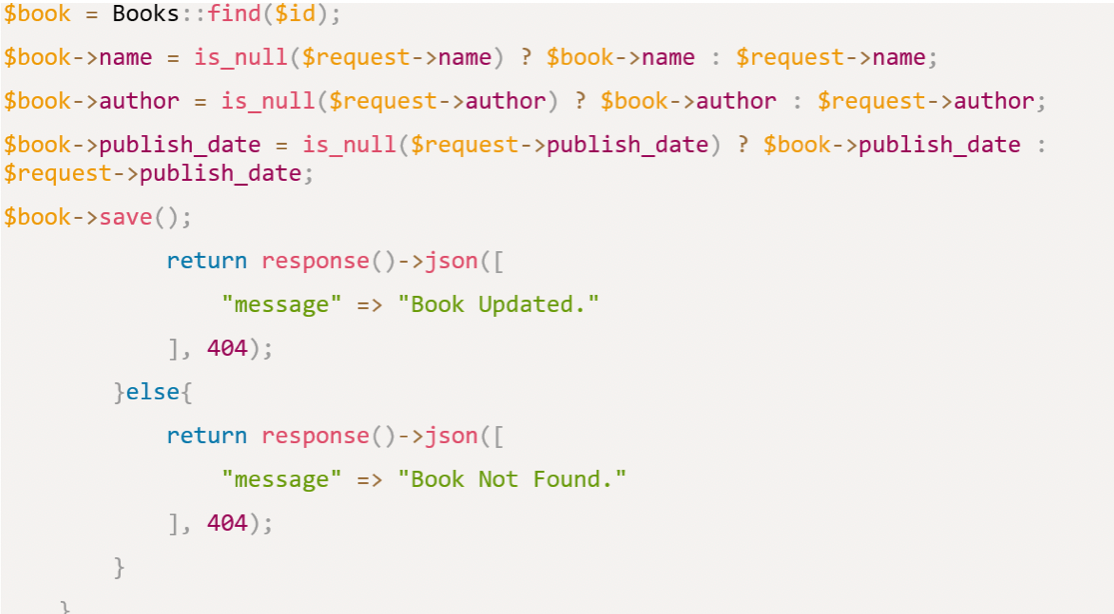
After this, you will create a controller at app/Http/Controllers/BookController.php. Next, run these commands:
7. Create the routes
Routing is a way to generate your application’s request URL. This URL doesn’t have to map to particular files on a site.
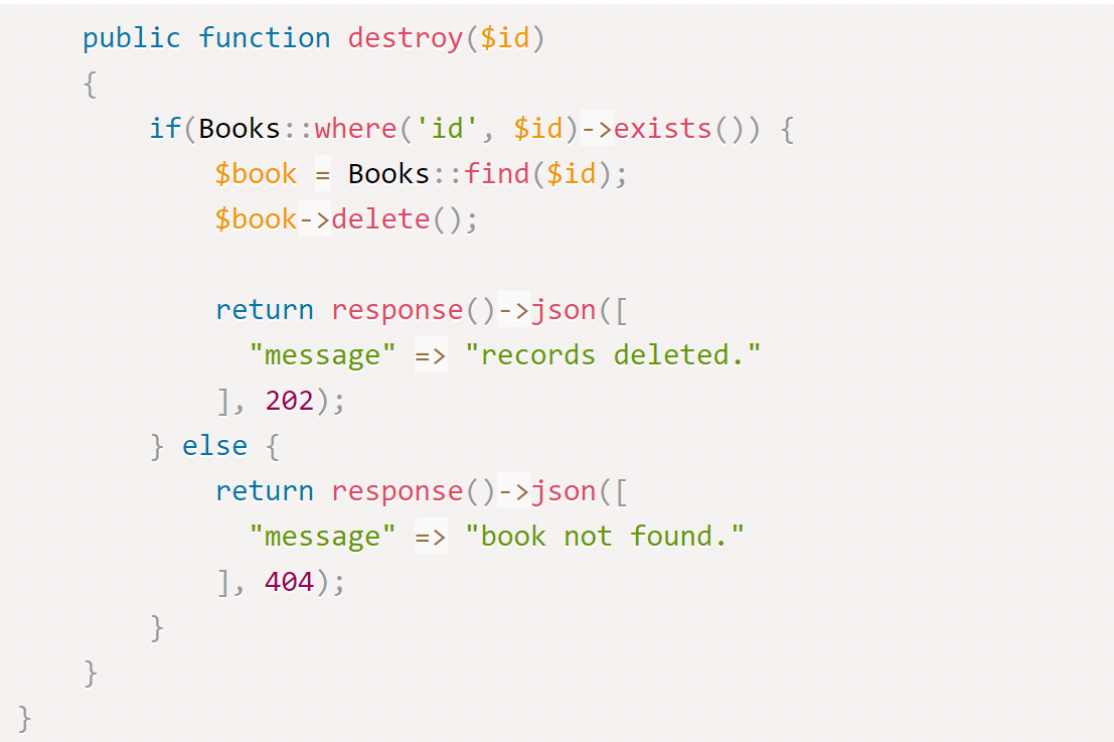
We have already created a method to handle CRUD for the books table. Now, we will provide implementations for this method at a particular URL. For this, we have to generate routes for specific functions.
All API routes have to be added to a particular file (routes/api.php) in Laravel. You can generate a custom route file and bind it to your application.
Let’s use the default route file in this example. After opening the routes/api.php file, run the following commands:
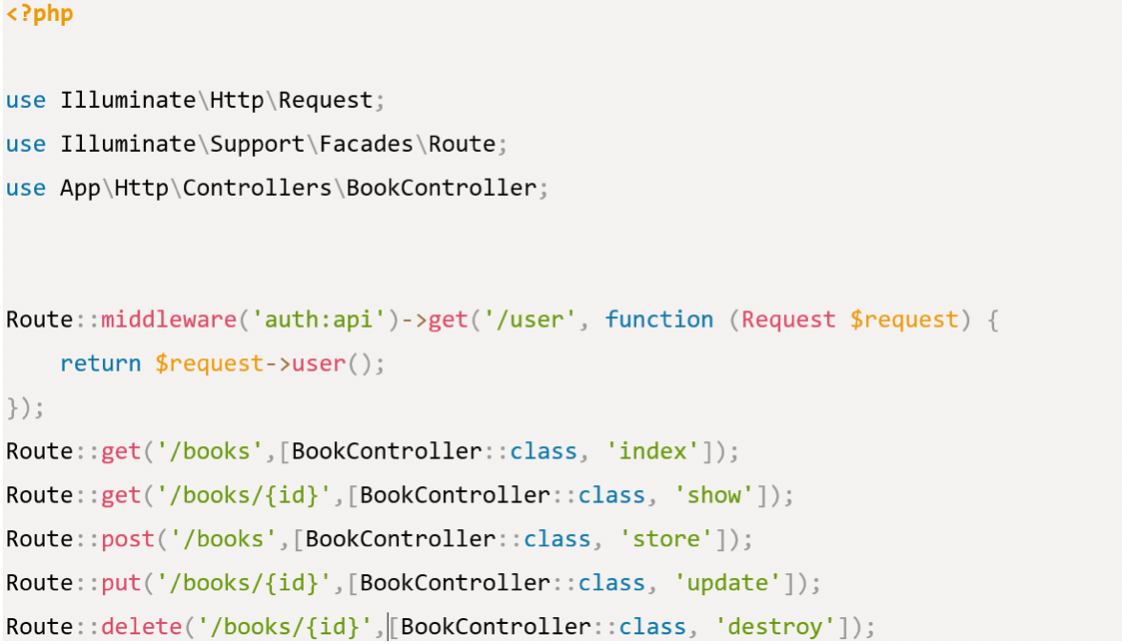
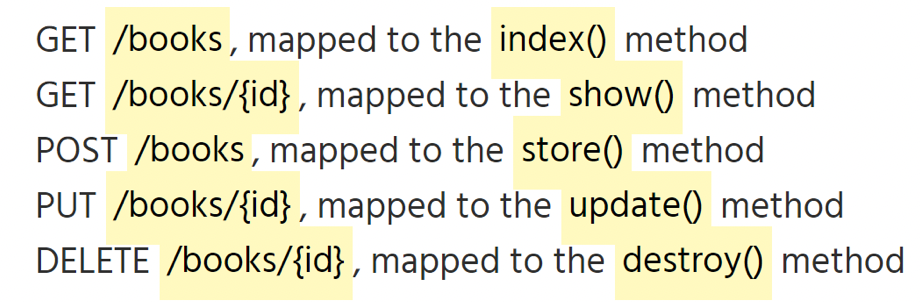
These routes bind functions to particular URLs as shown below.
8. Run Laravel API application
Use this command to run the API application.

You will get output like this:

Now you can test your API endpoints with any API testing tool. There are multiple external tools that you can use to test your API. However, testing inside Laravel is a much better option.
Conclusion
The Laravel framework has made it easier to create powerful and secure REST API quickly. The use of resource command streamlines the routing process by automatically adding all known routes to the application. The framework also provides dependencies for exception and error handling, so you can trace and resolve any bugs. To learn more about REST API, check out our blog post on the 10 REST commandments.
Treblle makes API management and monitoring a breeze. It gives you a complete picture of your API, so you know exactly what's ok and what’s not. If you have any questions, feel free to reach out or share them on our Treblle Discord Community.